


One of the most basic – and yet most essential – car maintenance activities you should do is changing your car’s engine oil.
Think of it as the blood of your engine. Oil is needed to lubricate and keep everything running smoothly under the bonnet, and frequent engine oil changes help to increase the performance and lifespan of your vehicle. If you only do one bit of car maintenance, do this one.
Your oil should be changed as part of a routine service procedure, but there might be times where your car would benefit from an oil change in between garage visits – or maybe you fancy trying to service and maintain your car yourself to save some money.
A mechanic will happily do an oil change for you but, depending on the car and where you take it, you could be charged £150 to £200 for what is a relatively simple task. The oil itself is probably £50, give or take, and once you’ve got some handy tools, you’ll probably save yourself £100 or more every time you do an oil change yourself.
If your car is under warranty, you should be able to change the oil yourself as long as the oil and parts used conform to the manufacturer’s specifications. Just double check the terms and conditions before you crack on.
When should I change my engine oil?

The longer oil stays in your vehicle, the less effective it is at protecting your engine. At the same time, the oil filter, which captures particles of dirt and debris, can fill up and become clogged.
Vehicle manufacturers recommend service intervals for each of their models, specifying which tasks should be carried out and when, including changing the engine oil and oil filter. You can find the exact intervals in your vehicle handbook, but generally, between once every 12 months or 8,000 miles up to once every 24 months or around 20,000 miles is the accepted time frame.
However, there’s no way to ruin a car by changing the oil more frequently than that. Provided you undertake the oil change correctly, you could change the oil every week if you really wanted to. Not that you should, because it would be incredibly expensive and unnecessary. If you have the time, changing your oil every six months is a cost-effective way of improving the longevity of your engine.
For petrol cars, clean oil is honey-coloured. Once it becomes dark and inky, it’s a good time to change the oil. Diesel cars typically use darker oil so it’s hard to tell based on the condition of the oil alone.
What you’ll need to change your engine oil
Before you start with the task at hand, make sure you have all the right supplies and equipment. Here’s what you’ll need:
- The proper amount and grade of motor oil (you should be able to find the correct amount and weight in your car’s owners manual)
- A high-quality oil filter (any automotive product retailer should be able to help you find the correct one for your car)
- A socket wrench
- An oil filter wrench
- A funnel
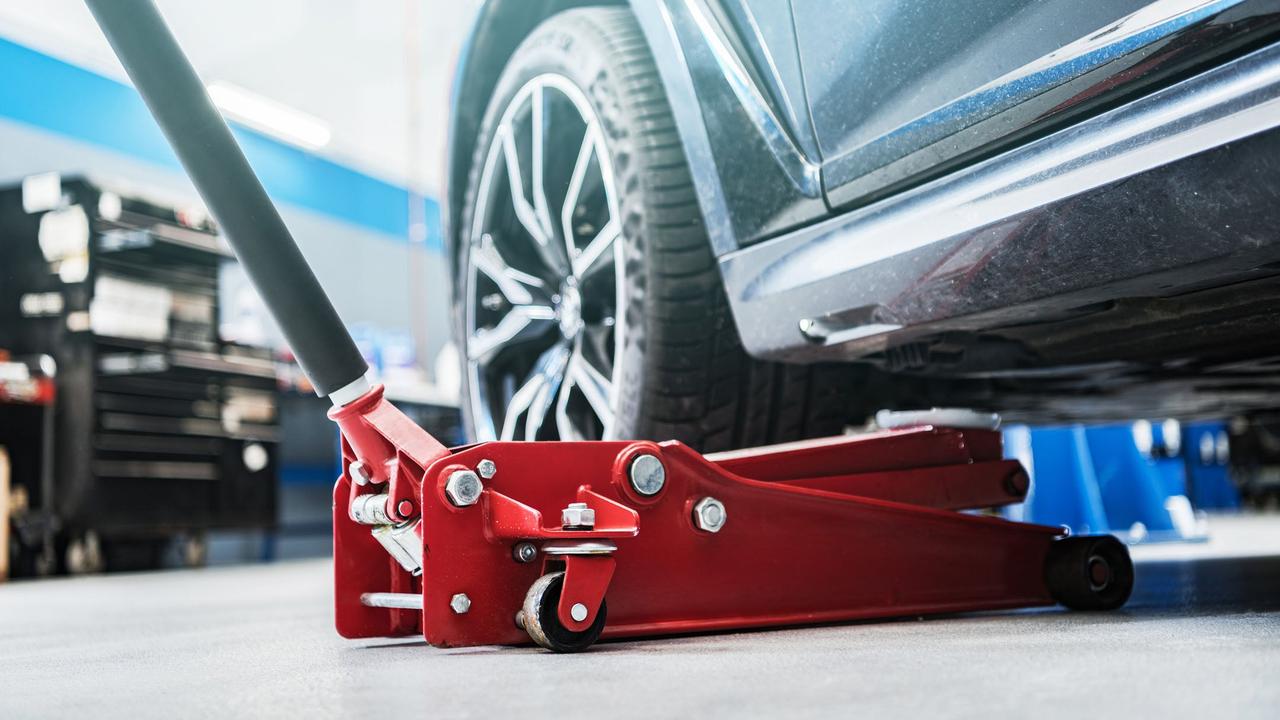
- Car jack
- Two axle stands
- Something to catch the old oil, like an oil pan or bucket
- Newspapers
- Rags
How to change your engine oil

1. Park on a flat surface
Make sure your car is on flat, even and stable terrain. If your car is automatic, put it in the park position; if it’s manual, make sure it’s in the neutral position. Engage the handbrake, chock the back wheels and use a jack to raise your vehicle.
Make sure to find your car’s designated jacking points and the right place to put the axle stand, then jack up one side and slide the stand in. Repeat for the other side so the car is resting securely on the axle stands.
2. Run your engine for about five minutes
Oil that’s settled down in a cold engine over time becomes rife with metal particles and dirt. This is why running your engine for around five minutes is a good idea to start with as it allows the oil to become thinner, and easier to drain as a result.
Once it’s warmed up, don’t drain the oil immediately. Wait another five or 10 minutes to let the temperature slightly decrease to prevent burning yourself.
3. Drain the old engine oil
Remove the sump plug (found under the car) using a wrench to unscrew. Keep an oil pan handy and place it directly under the sump plug to catch any oil flowing out. You may first need to remove any undertrays before you can access the sump plug.
Allow several minutes to let the oil drain completely – even if there is no more visible oil dripping from the sump, you may still need to wait a couple more minutes. Once you’re confident it’s drained, screw the sump plug back on.
4. Remove the oil filter and clean the filter compartment
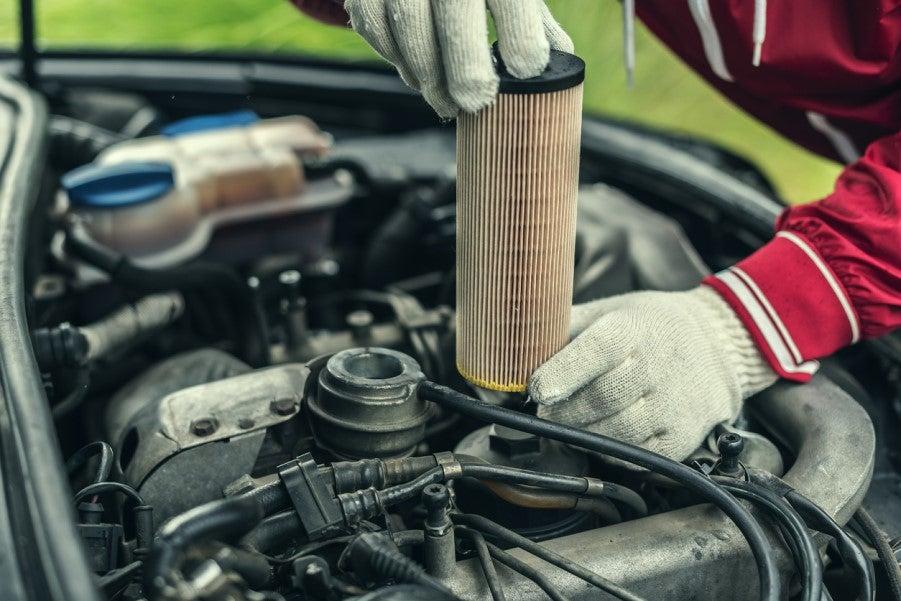
Remove the oil filter using the oil filter wrench or sandpaper to increase the grip on the filter cap.
Once removed, clean the compartment of the oil filter using clean rags or cloth, making sure there are no signs of the old oil seen in the filter compartment.
5. Place the new oil filter
Changing the engine oil also means replacing the oil filter too. Changing the O-rings (the small, rubber, circular donuts that sit between components to reduce leakage) is a good idea too as it ensures no leaking takes place.
Lubricate the O-ring with the new engine oil to ensure a perfect seal. Place on the oil filter and tighten the filter cap, making sure to apply the recommended torque force (this is printed on most oil filters) when tightening the cap. Hand-tightening it is usually enough. Don’t over-tighten the filter because this will make it very difficult to take the filter off next time.
6. Add new engine oil
Use a funnel to facilitate filling your engine with new oil. The oil cap is located at the top of the engine – typically marked with an oil can sign.
You should know at this point how much oil you need to put in your engine. If not, look at your vehicle manual first to get an idea of how much oil your engine needs. You can also use your dipstick to see how much oil you’ve poured and avoid overfilling too.
Close and tighten the cap once you’ve filled your engine with the correct amount and type of engine oil.
7. Start your car’s engine
Allow your engine to run for a couple of minutes after every oil change to allow it to circulate throughout the engine.
This also lets you see if there are any leaks too. If there are, turn the engine off, let it cool for a bit and tighten the parts that are leaking.
8. Check the engine oil level
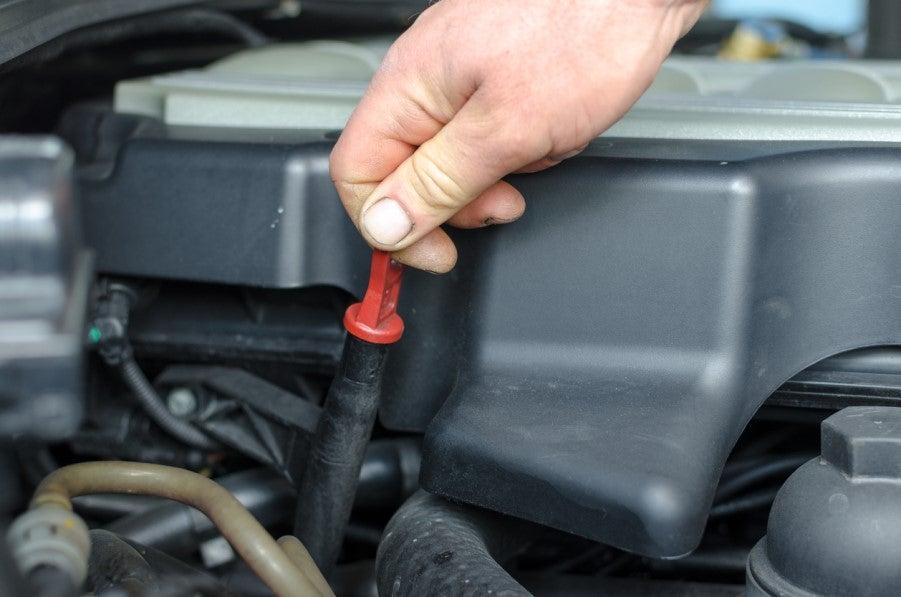
Once you’ve let the oil circulate, turn off the engine and let it cool for about five minutes.
Check the oil level using the dipstick; it should be between the MIN and MAX markings on the dipstick, though some vehicle manufacturers recommend the dipstick oil level to be at MAX.
Check your owner’s manual for clarification.
9. Make a note of the oil change
An essential step that you shouldn’t forget is documenting the oil change, including the mileage shown on your vehicle’s odometer. This lets you know when the next oil change will be.
Writing down the mileage of the recently completed oil change will give you an idea of when you should start checking your oil for a possible change again.


